
Can you use Command strips to mount these Funko shelves on the wall?
I've been asked this question dozens of times, and certainly had this question myself when I first started to display my Funko Pop Vinyl figures and boxes on the wall.
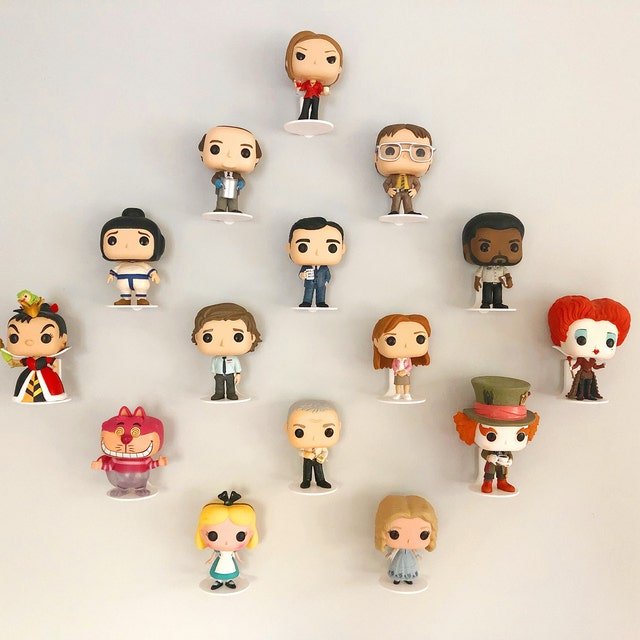
After trying so many options, including nails, screws, push-pins, even really large thumb tacks, I've found that YES, you can indeed use Command Strips to adhere Funko figure shelves and Funko box floating shelves to the wall! Yay! Eureka!
And what's even better is the Superhero DIY is always sure to include Command strips for our Funko Figure shelves (out of box) and Simple Funko Box shelves at no extra charge! We know these things can be pricey, so make them easy to get.
And if you need more Command strips, you can always get more from us - so you only have to get as many as you need.

To mount your Funko Pop floating shelves properly though, you've got to do it right!
Command Strip tips and tricks for solid wall-mounting
Here are some tips to keep in mind when mounting anything using Command strips:
1. Orient them in the right direction
I've found that they hold differently depending on the way you orient the strip. If you have weight that is pushing down (vertically), then the strip should be mounted vertically as well. The adhesive just seems to stick better and more reliably over time when it's oriented vertically.

2. Cut them to size
It doesn't seem to matter whether you use the whole strip or not, or even if you leave the pull tab in place. In fact, I don't ever want to see the pull tab if I don't have to!
For some shelves, like the honeycomb box shelves, I cut most of the command strip away and only adhere enough to cover the size of the back. That way I don't have ugly command strip peeking out the bottom, but I have enough to stick it to the wall securely!
3. Black goes on the wall
Each Command strip has two sides - the red logo side which is meant to go on whatever is being mounted to a wall, and the black text side, which goes on the wall. Each side is specifically formulated to have the best stick for each surface type.

4. Push harder!
You want to make sure that 3M command strip actually stays adhered to your wall and the shelf! The last thing you want is for your figure or box to come off of the wall and crashing onto the floor! For that reason, I highly recommend that you use some force to fully adhere the strip to both surfaces.
When I'm applying the strip to the back of my funko figure shelves, I first remove the side with red text (item side), which is the part that sticks to your shelf. Then I press it onto the back of the shelf nice and hard.
Next, I remove the other side with black text (the wall side) and attach the shelf where I want it on the wall. I press hard on the back part of the shelf -- not on the front, it will break! When I'm happy with the adhesion to the wall, I add my funko figure.
**NOTE: Don't push the shelf in a way that will make it break! Instead, apply pressure against the flat surface opposite the command strip to ensure a good hold.**
For more tips, check out this great post for 7 Ways You've Been Using Command Strips All Wrong.
Mounting your Funko Display Shelves
Now that we have the three tips/tricks down, how to actually mount the shelves? Let's get to it!
Funko Figure Shelves
These are meant for individual pops, displayed out of the box:
- Remove the red logo backing of the command strip
- Apply exposed side to back of figure shelf, push hard to adhere
- Remove black text backing of the command strip
- Apply to wall -- PUSH against the flat back of the shelf to adhere to wall
- Add your 4" Funko vinyl pop figure

Funko Box Shelves
***WARNING: Due to the increased weight of a Funko box with a figure, we do recommend using screws to securely mount a box shelf to the wall. A Command strip will work, just not as securely.**
These are the more "square" shelves we offer, either with the hex pattern or open concept:
- Cut any "white" area of the Command strip off - only the part with backing should be left
- Remove the red logo backing of the command strip
- Apply exposed side to back of box shelf on each side, push hard to adhere
- Remove black text backing of the command strip
- Apply to wall -- PUSH against the flat back of the shelf right where your strips are mounted to adhere to wall
- Add your 4" Funko vinyl pop box

Simple Box Shelves
***WARNING: Due to the increased weight of a Funko box with a figure, we do recommend using screws to securely mount a box shelf to the wall. A Command strip will work, just not as securely.**
These are the very simple "L-style" shelves, more functional than anything:
- Remove the red logo backing of the command strip
- Apply exposed side to back of simple box shelf, push hard to adhere
- Remove black text backing of the command strip
- Apply to wall -- PUSH against the flat back of the shelf to adhere to wall
- Add your 4" Funko box

As mentioned in red above, if you really want to make sure you mount your Funko figure boxes securely to the wall for an amazing, yet secure display, we highly recommend using screws. That's what we made the screw-holes for! :)
We hope your display works amazingly with our floating shelves for Funko Pop vinyl figures and Funko Pop boxes. And once you get your display set up, definitely let us know how it looks! Slide into our DMs or post and @mention us on Instagram at https://instagram.com/superherodiy.
Most importantly, be proud of the great display you were able to DIY!